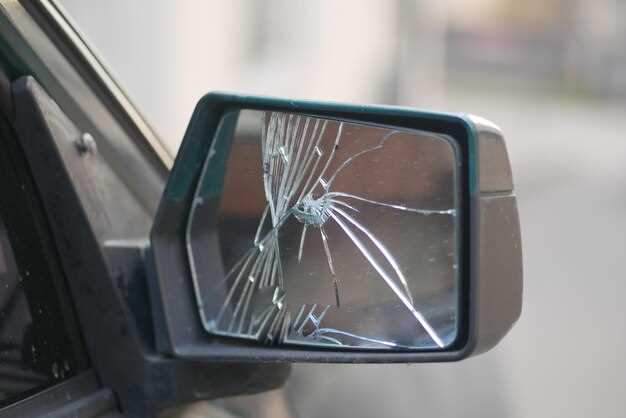
How to Replace a Broken Side Mirror
- Arthur Rodriquez
- 0
- Posted on

Replacing a broken side mirror is an essential skill for any car owner. Whether you’ve been involved in a minor accident or your mirror has simply worn out over time, knowing how to perform this replacement can save you time and money. A functional side mirror is crucial for safe driving, as it helps you maintain awareness of your surroundings and monitor blind spots.
This guide will walk you through the step-by-step process of replacing a broken side mirror, ensuring that you can restore your vehicle’s functionality in no time. By following these clear and straightforward instructions, you will learn how to remove the damaged mirror, obtain a suitable replacement, and install the new side mirror correctly.
Having a broken side mirror can be not just an inconvenience but also a potential hazard. By taking prompt action to replace it, you are not only enhancing your vehicle’s safety features but also complying with road regulations. Let’s dive into the detailed steps for a successful side mirror replacement.
Gather the Necessary Tools and Materials for Side Mirror Replacement
Before you begin the replacement of a broken side mirror, it is essential to gather all necessary tools and materials. This preparation will ensure the process goes smoothly and efficiently.
First, identify the type of side mirror you need for your vehicle. This includes checking if the mirror is manual or powered, as well as its specific model number. Once you have the correct replacement mirror, you can move on to the tools required.
Typically, the following tools will be needed for the replacement process:
- Screwdriver Set: A variety of screwdrivers, including Phillips and flathead, will help you remove the mirror from the vehicle.
- Socket Set: Depending on the car model, you may require specific socket sizes to detach the side mirror from the door.
- Trim Removal Tools: These can assist in prying off any trim pieces that may obstruct access to the mirror assembly.
- Wire Cutters: Useful if there are electrical connections that need to be cut before removing the mirror.
In addition to tools, ensure you have all necessary materials ready for installation:
- Replacement Side Mirror: Purchase an OEM (original equipment manufacturer) or aftermarket mirror that suits your vehicle’s specifications.
- Electrical Connectors: If your side mirror has electrical features, make sure to have compatible connectors for proper installation.
- Adhesive or Tape: Depending on your mirror type, you might need adhesive or double-sided tape for a secure fit.
- Cleaning Supplies: Have a cloth and cleaner ready to wipe down the area before and after the replacement.
By gathering these tools and materials beforehand, you’ll be well-equipped to proceed with the side mirror replacement confidently.
Remove the Broken Side Mirror Safely and Efficiently

Begin by gathering the necessary tools, including a flathead screwdriver, a socket wrench, and a pair of safety gloves. Ensure you have a clean workspace around your vehicle to prevent any accidents during the removal process.
Next, carefully disconnect the car battery to avoid electric shocks, especially if your side mirror is integrated with electrical components like heating or turn signals. This step is crucial for maintaining safety throughout the procedure.
Locate the screws or bolts securing the broken side mirror to the vehicle. These are typically found on the inner door panel. Use the flathead screwdriver or socket wrench to unscrew them gently, ensuring not to strip the screws. If there are any plastic covers concealing the screws, remove them carefully to access the fasteners.
Once the screws are removed, gently pull the side mirror away from the door. If the mirror is stiff, check for any additional clips or connections that may be holding it in place. Disconnect any wiring harness attached to the mirror by pressing the release tab and pulling the connector apart.
After the mirror is completely detached, inspect the mounting area for any debris or damage that might interfere with the new mirror installation. Clean the area thoroughly to ensure a proper fit for the replacement mirror.
Install the New Side Mirror and Ensure Proper Functionality

Once you have obtained the replacement mirror for your vehicle, it’s time to install it and ensure that it functions as intended. Follow these detailed steps for a successful installation.
-
Align the New Mirror: Take the new side mirror and align it with the mounting bracket. Ensure that all connecting points match perfectly.
-
Secure the Mirror: Using the screws or bolts that were previously removed, attach the new mirror to the door frame. Tighten them firmly, but be cautious not to over-tighten, as this might damage the mirror or the bracket.
-
Reconnect Wiring: If your replacement mirror has electrical features such as heating or blinking signals, reconnect the wiring harness. Ensure each connector clicks securely into place.
-
Test Mirror Position: Adjust the mirror to its desired angle. Some mirrors have manual adjustments, while others might have power controls. Make sure the positions are easily adjustable, confirming the replacement works as intended.
-
Check Functionality: Test all features of the new mirror, including the heating element and any integrated lights, to confirm they operate properly. Make adjustments if necessary.
-
Perform a Final Check: Once everything is installed, give the mirror a final inspection. Ensure that it is securely attached and free from wobbling. Check visibility from the driver’s seat to ensure optimal functionality.
By carefully following these steps, you can successfully complete the installation of your new side mirror and ensure its proper functionality on the road.