
How to Fix a Flat Tire Safely

Encountering a flat tire can be an unsettling experience, but knowing how to effectively repair it can restore your peace of mind and get you back on the road quickly. Understanding the essential steps involved in tire repair is crucial not only for your safety but also for enhancing your confidence in handling such situations independently.
In this article, we will outline safe steps to repair a flat tire, ensuring you are well-equipped to address this common issue. From the necessary tools to a step-by-step guide, you will gain valuable insights that empower you to tackle tire repairs without hesitation. Whether you are at home or on the side of the road, having a clear plan will allow you to manage a flat tire more efficiently.
It’s important to approach tire repair with a focus on both safety and precision. Gaining proficiency in this skill not only enables you to save time and money but also instills a greater sense of self-reliance. Let’s delve into the essential techniques and precautions that will help you repair a flat tire with confidence.
Assessing the Damage: When to Repair or Replace
When you encounter a flat tire, the initial impulse is often to assess the damage and decide whether to repair or replace it. Understanding the extent of the damage is crucial for making this determination.
Firstly, inspect the tire for visible punctures or cuts. If the damage is less than 1/4 inch in diameter, especially if it is located in the tread area, it is typically possible to repair it. Punctures outside of this area, or larger damages, generally require tire replacement.
Next, check the sidewalls. Damage to the sidewall, including bulges, cracks, or tears, often signifies that the tire should be replaced. Sidewall integrity is essential for safe driving, and any significant issues here can compromise performance and safety.
Additionally, consider the age of the tire. Even if a flat tire is repairable, an older tire with worn tread or other degradation may not be safe for continued use. If the tread depth is below the legal limit or if you see signs of uneven wear, it might be wiser to replace the tire altogether.
Finally, consult a professional if there is any doubt. A qualified technician can help assess whether the tire can be effectively repaired or if replacement is the more responsible choice. Making an informed decision is key to ensuring your safety on the road.
Choosing the Right Tools for Tire Repair
When it comes to tire repair, having the right tools is essential for a successful and safe outcome. A well-equipped toolkit can make the difference between a temporary fix and a long-lasting solution. Start with a reliable tire repair kit, which typically includes a variety of essential items.
A tire patch is crucial for repairing punctures. It may also be useful to have a set of tire plugs, which can quickly seal larger holes. Ensure you have a reamer, which helps to prepare the hole for a patch or plug by cleaning and widening it as necessary.
A good quality tire inflator or a portable air compressor is indispensable for reinflating the tire after repairs. Make sure it is compatible with your vehicle’s tire valve and has the capacity to inflate your tires effectively.
Aside from patch kits and inflators, a tire levers set is needed to help remove the tire from the rim, particularly for those who prefer a DIY approach. A torque wrench may also be beneficial for tightening lug nuts to the manufacturer’s specifications once the tire is reinstalled.
Lastly, don’t forget safety gear. Having gloves and safety glasses will protect you during the repair process. With these tools in hand, you can approach tire repair with confidence, ensuring both efficiency and safety.
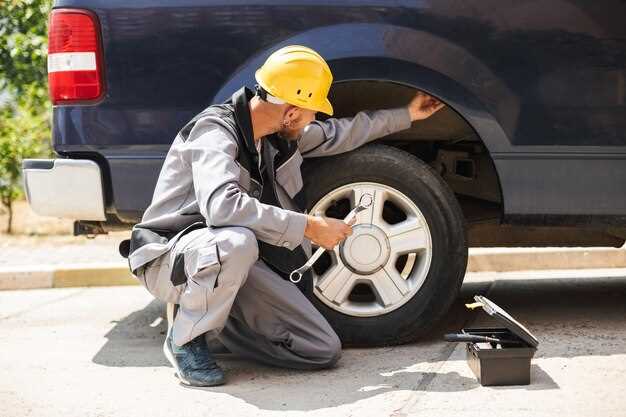
Step-by-Step Guide to Properly Fixing a Flat Tire
Experiencing a flat tire can be frustrating, but knowing how to fix it can save you time and money. Follow this comprehensive guide to effectively repair a flat tire.
-
Safety First
Ensure your vehicle is in a safe location, away from traffic. Turn on your hazard lights and set the parking brake.
-
Gather Necessary Tools
Collect all the tools you need:
- Spare tire
- Jack
- Tire iron
- Tire sealant (if applicable)
- Pressure gauge
- Safety gloves
-
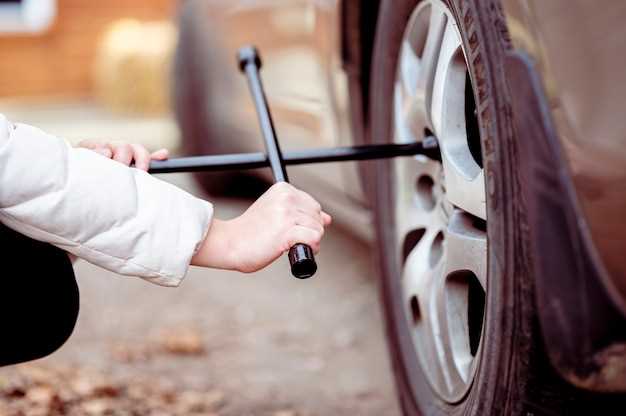
Loosen the Lug Nuts
Before raising the vehicle, use the tire iron to loosen the lug nuts on the flat tire. Turn them counterclockwise but do not remove them completely yet.
-
Lift the Vehicle
Position the jack under the vehicle’s jack point, ensuring it’s stable. Raise the vehicle until the flat tire is off the ground.
-
Remove the Flat Tire
Now remove the loosened lug nuts completely and take off the flat tire. Set it aside safely.
-
Inspect the Tire
Check the flat tire for visible damage or objects that might have caused the flat. This can help decide whether it can be repaired or needs replacement.
-
Install the Spare Tire
Align the spare tire with the wheel hub and push it onto the hub. Hand-tighten the lug nuts onto the spare tire.
-
Lower the Vehicle
Carefully lower the vehicle back to the ground using the jack. Once the flat tire is on the ground, apply pressure to fully tighten the lug nuts with the tire iron in a crisscross pattern.
-
Check Tire Pressure
Use a pressure gauge to check the pressure of the spare tire. Inflate it to the recommended PSI if necessary.
-
Clean Up
Gather all your tools, and store the flat tire and equipment properly in your vehicle. Ensure you’re all set to drive away safely.
By following these steps, you can confidently address a flat tire situation and be back on the road quickly. Always remember to regularly check your tire pressure and tread to prevent future issues.