
How to Install Seat Covers Properly

When it comes to enhancing the interior of your vehicle, proper installation of seat covers is a critical step that cannot be overlooked. Seat covers serve not only as a protective layer for your seats but also as a means to personalize your driving experience. Whether you’re aiming to preserve the original upholstery or change the aesthetic entirely, understanding the installation process is essential for achieving optimal results.
Choosing the right seat covers is important, but even the best covers will not perform well if they are not installed correctly. This guide provides detailed instructions on how to properly fit seat covers to ensure they stay in place and maintain their appearance over time. By following these steps, you can safeguard your seats and enjoy the comfort and style that well-fitted covers can bring.
Moreover, it is important to consider the type of materials used in the covers, as they can significantly affect both the look and functionality. From leather to fabric, each material presents unique challenges during installation. In this article, we will outline the essential techniques tailored to different types of seat covers, ensuring that your installation process is smooth and results in a professional finish.
Choosing the Right Type of Seat Covers for Your Vehicle
Selecting the ideal seat covers for your vehicle is essential for both protection and aesthetics. The first step is to assess the type of material that best suits your needs. Common options include leather, neoprene, polyester, and cotton, each offering distinct benefits and levels of durability. Leather provides a luxurious feel and is easy to clean but may be vulnerable to damage in extreme temperatures. Neoprene, on the other hand, is waterproof and ideal for active lifestyles, offering excellent protection against spills and stains.
Next, consider the fit of the seat covers. Universal seat covers are more affordable but might not provide the snug fit that tailored options do. Custom-fit covers are designed specifically for your vehicle’s make and model, ensuring seamless installation and a polished look. Additionally, pay attention to the design and color of the covers to complement your vehicle’s interior. Bright colors and patterns can add personality, while neutral tones may contribute to a more classic appearance.
Installation should also be a critical consideration. Many seat covers come with easy-to-follow instructions, but some may require additional tools or expertise, particularly for more complex designs. Ensure that the installation process is straightforward to avoid any frustration. Lastly, take your lifestyle into account. If you have pets or children, select covers that are not only stylish but also functional and easy to maintain. By carefully evaluating these factors, you can choose the perfect seat covers that enhance both the look and function of your vehicle.
Step-by-Step Process for Installing Seat Covers Securely
Installing seat covers can enhance the appearance of your vehicle’s interior while protecting the original upholstery. Follow this detailed guide for a secure installation.
-
Choose the Right Seat Covers: Ensure that the selected covers are compatible with your vehicle’s make and model. Check for sizing and material specifications to guarantee a proper fit.
-
Gather Necessary Tools: Prepare the required tools for installation, which may include scissors, a screwdriver, and possibly a pair of pliers for securing straps.
-
Remove Existing Seat Covers: If your seats have old covers, carefully remove them. This may involve unfastening clips, straps, or using a screwdriver to take off any attached components.
-
Clean the Seats: Thoroughly clean the seat surfaces before installation. Vacuum any debris and wipe down the fabric or leather to ensure a smooth application.
-
Lay Out the Seat Covers: Before installation, lay out the new seat covers to familiarize yourself with their shapes and designated areas for each part.
-
Start with the Backrest: Begin the installation with the backrest section. Slip the cover over the backrest and adjust it to fit snugly. Tuck any excess fabric into the crevices.
-
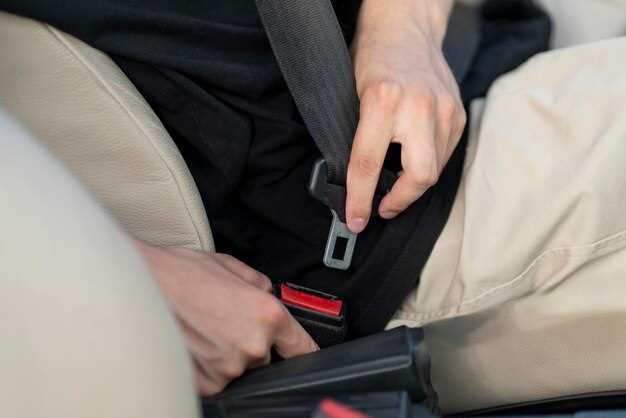
Secure the Cover: Use the attached straps or hooks to secure the cover in place. Ensure that it is fastened tightly to prevent slipping during use.
-
Move to the Seat Base: Next, install the cover for the seat base. Similar to the backrest, slip it on and adjust for a tight fit, tucking in excess fabric as necessary.
-
Final Adjustments: Check that all areas of the seat covers are fitted securely. Smooth out any wrinkles and ensure that the covers do not obstruct seat functionality.
-
Test for Stability: Sit on the seats to test the stability of the covers. Make sure they remain securely in place and adjust as needed. If necessary, re-tighten any straps or clips.
Completing these steps will ensure a successful and secure installation of your seat covers, enhancing both style and protection for your vehicle.
Maintaining and Cleaning Your Seat Covers After Installation
Proper care and maintenance of your seat covers are essential to prolonging their life and ensuring they look great post-installation. Regular cleaning helps prevent dirt accumulation and stains, keeping your vehicle’s interior fresh.
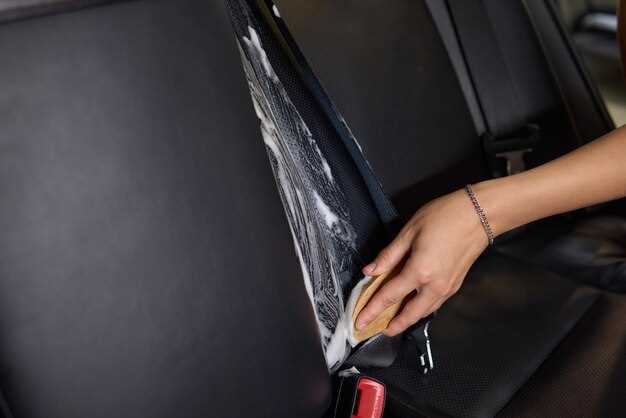
Start by removing any loose debris from the covers. Use a soft brush or a vacuum cleaner with a brush attachment to gently remove dirt and dust. This step is crucial to prevent particles from scratching the material during cleaning.
For fabric seat covers, use a mild detergent mixed with water. Dampen a microfiber cloth with the solution and gently scrub the affected areas. Avoid soaking the covers, as excess moisture can lead to mold and mildew. After cleaning, wipe the covers with a clean damp cloth to remove any soap residue.
If you have leather or vinyl seat covers, it’s best to use a dedicated cleaner designed for those materials. Apply the cleaner with a soft cloth, following the manufacturer’s instructions. After cleaning, condition the leather to restore moisture and maintain its suppleness.
For tough stains, consider spot cleaning with a specialized stain remover, ensuring it’s compatible with your seat cover material. Always test any cleaner in a small inconspicuous area first to avoid discoloration.
Regularly check for any signs of wear or damage on the covers. If you notice any tears or fraying, address the issue immediately to prevent further deterioration. Repair kits or patches can be used for minor damage.
Lastly, protect your seat covers from direct sunlight whenever possible, as prolonged exposure can cause fading and deterioration. Use sunshades and park in shaded areas to minimize UV damage, ensuring your seat covers remain vibrant.