
How to Remove Stains from Upholstery

Maintaining the cleanliness and appearance of your upholstery can be challenging, especially when faced with stubborn stains. Whether it’s a spilled drink, a pet accident, or everyday dirt accumulation, knowing how to effectively deal with these issues is essential for preserving the longevity of your furniture. This article aims to simplify the cleaning process, equipping you with practical tips and techniques for removing stains from various types of upholstery.
Understanding the composition of your upholstery is the first step in effective cleaning. Different materials require specific approaches, as some are more delicate than others. For instance, leather upholstery might necessitate a different cleaning solution than fabric upholstery. Familiarizing yourself with the right methods and products is crucial for avoiding damage and ensuring a successful cleanup.
In this guide, we will explore a range of stain removal techniques, from DIY solutions using household items to professional cleaning products. Whether you are tackling fresh stains or older marks, these easy-to-follow steps will help you restore the beauty of your upholstery, making your furniture look as good as new. Set aside your worries about stubborn stains, and let’s get started on the path to a cleaner, fresher home.
Identifying Different Types of Upholstery Stains
Understanding the nature of stains on upholstery is essential for effective cleaning. Stains can be broadly categorized into several types, each requiring specific treatment methods.
Food and Beverage Stains: These are among the most common types of upholstery stains. Spills from sauces, coffee, wine, or juice can leave behind marks. It’s crucial to address these stains quickly to prevent them from setting. Blot the area with a clean cloth, and use a mild detergent solution for cleaning.
Grease and Oil Stains: Grease stains can occur from food, body oils, or even cosmetics. They typically require a solvent-based cleaner or a commercial upholstery cleaner specifically designed to break down oily residues. Gently dab the stain and avoid rubbing, as this can spread the oil further.
Ink Stains: Ink, whether from a pen or printer, can leave a significant mark on fabric. Immediate action is crucial; use rubbing alcohol on a cotton ball to dab the ink stain. Test the solution on an inconspicuous area first to ensure it doesn’t discolor the fabric.
Pet Stains: Pet accidents can result in stains that are not just unsightly but also odorous. It’s essential to use enzymatic cleaners that specifically target biological stains. After treating, rinse the area with water and blot dry.
Wax and Gum Stains: These challenging stains can be removed by hardening the wax or gum with ice, then gently scraping it off. Follow up with a damp cloth and a mild detergent to clear any residual color.
In conclusion, identifying the type of stain is the first step toward successful cleaning. Each stain type has its solution, and prompt attention can help restore your upholstery to its original condition.
Step-by-Step Guide to DIY Upholstery Cleaning

Cleaning upholstery can seem daunting, but with a systematic approach, you can effectively remove stains and maintain the appearance of your furniture. Follow this step-by-step guide for successful DIY upholstery cleaning.
Step 1: Gather Your Supplies
Before you start, collect the necessary cleaning supplies. You will need a vacuum cleaner with an upholstery attachment, soft-bristle brushes, a clean cloth, mild detergent, white vinegar, water, and a spray bottle. For specific stains, consider having specialized stain removers on hand.
Step 2: Perform a Thorough Vacuuming
Use the vacuum cleaner to remove dust, dirt, and debris from the upholstery. Pay close attention to crevices and seams where dirt can accumulate. This step prepares the fabric for deeper cleaning.
Step 3: Test a Small Area
Before applying any cleaning solution, test it on a small, inconspicuous area of the upholstery. This ensures that the fabric will not be damaged or discolored during the cleaning process.
Step 4: Prepare Your Cleaning Solution
Mix a solution of mild detergent and water, or combine equal parts white vinegar and water for a natural cleaner. Shake the solution in the spray bottle until it’s well mixed.
Step 5: Apply the Solution
Lightly spray the cleaning solution onto the stained area or a section of the upholstery, ensuring it is damp but not soaked. Avoid over-saturation, as this can cause water damage or lead to mold growth.
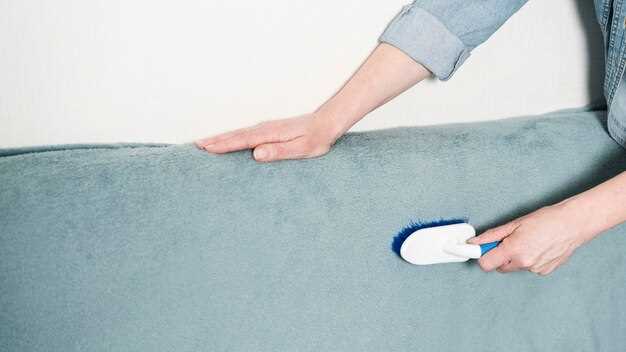
Step 6: Gently Scrub the Area
Using a soft-bristle brush or clean cloth, gently scrub the area in a circular motion. This helps lift the stain without damaging the upholstery. For tougher stains, you may need to repeat this process.
Step 7: Blot the Area
After scrubbing, take a clean, dry cloth to blot the area. This removes excess moisture and cleaning solution. Ensure you are blotting, not rubbing, as rubbing can worsen the stain.
Step 8: Rinse if Necessary
If any cleaning solution residue remains, lightly mist the area with plain water and blot again with a clean cloth. This will help ensure that no soap is left behind, which can attract more dirt.
Step 9: Allow It to Dry
Let the upholstery air dry completely. If possible, use fans or open windows to facilitate faster drying. Avoid sitting on the furniture until it is fully dry to prevent re-soiling.
Step 10: Regular Maintenance
Once the upholstery is clean, maintain it by vacuuming regularly and addressing spills immediately. Consider applying a fabric protector to guard against future stains.
By following these clear steps, upholstery cleaning becomes a manageable task, helping keep your furniture looking fresh and inviting.
Preventive Measures to Avoid Future Stains on Upholstery
Preventing stains on upholstery is essential for maintaining its appearance and longevity. One of the most effective ways to protect your upholstery is by applying a high-quality fabric protector. This treatment creates a barrier that repels liquids and makes it easier to clean spills before they can set in.
Additionally, consider using slipcovers or throws in high-traffic areas. These removable and washable items can shield the underlying fabric from everyday wear and unexpected accidents, significantly reducing the risk of permanent stains.
Establish a strict no-food or no-drink policy in areas with upholstered furniture. This simple rule can drastically minimize the chances of spills that lead to stains. If kids or pets are present, encourage the use of designated play areas or feeding zones far from your upholstered pieces.
Regular cleaning and maintenance are critical. Vacuum your upholstery frequently to remove dirt and allergens that can contribute to staining. Identify any specific stains promptly and treat them according to manufacturer guidelines to prevent setting.
Consider the placement of your upholstered furniture. Keep it away from direct sunlight, as UV rays can fade colors and weaken fibers, making fabrics more prone to staining. Using curtains or shades can help mitigate the effects of sunlight.
Finally, educate all household members about the importance of caring for upholstery. Sharing knowledge about identifying potential stains and implementing cleaning protocols helps create a collective effort in preserving your upholstery.